Hey everyone! I finally finished the tutorial! Let’s get started :)
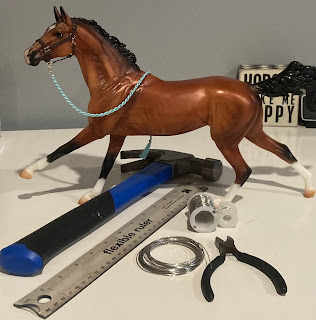
Supplies:
Wire (I use 18 gauge)
Smaller Wire ( mine strangely doesn’t say what gauge it is but it’s an half the size of the 18 gauge)
Wire cutters
Optional:
A Ruler
A Hammer
One of your favorite horses ;)
We’re going to start with the halter squares:

First get your 18 gauge wire and clip off a couple inches. Remember, it’s better to have to much than not enough.
Next you’re going to take the wire cutters and use those to hold and bend the wire. Remember not to pinch it too hard or else it will cut the wire.
You’re going to bend it to the side to make a 90 degree angle like this:
Then do that same thing again so it should look like this:
Then cut the short side just a little less than a quarter of a inch
After that, hold the wire directly across from the section you just cut off
And bend it inwards so it’s touching the tip of wire you cut.
After that’s done, you’re going to hold it with the cutters just outside the section you just met together and bend it upward so it looks like this:
Then you’re going to change the position of the pliers again to right about in the middle of the long wire
Then fold it inwards, so that it looks like this:
If you want it to be a 2 square piece, then you could just leave it here and cut off the excess. But if you want a three square halter ring, then keep following along.
Next, you’re going to fold the long piece down
Then inwards again, so that it’s like this:
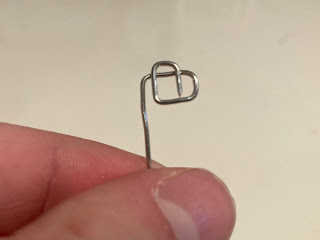
You did it! A cute little halter square!
One of the things I’ve done before is hammer it down a little, so it looks more flat. I didn’t really like how it looked but if you do, feel free to do it!
I decided to add making buckles to this tutorial as well!
I don’t make them as much anymore since I got these perfect size buckles from Amazon. But if you want them bigger or smaller, or don’t have any buckles, knowing how to make them will come in handy :D
At first, it’s pretty similar to making the halter squares. Cut a couple inches off the 18 gauge wire
and bend it inwards again, making another right angle.
Do it again so that it’s almost little square
And bend it again so it’s a cute little square!
Bend it up so it looks like this:
And up again so the ends meet!
now to take the tiny wire and make…
A tongue! One of Jennifer Buxton’s tack tip posts on her awesome blog explains how to put them on. Here is a link
http://braymere.blogspot.com/2009/01/tacktips-photo-etched-bucklesIf anybody has any questions, please post them in the comments and I’ll help you out the best I can. And don’t get discouraged if your halter squares and buckles don’t look perfect right away. Mine looked terrible at first, no joke! Keep trying and experimenting and you’ll get better! And if anyone wants to show me the buckles, halter squares, and the halters; bridles etc. you put them on, I’d love it💕 My email is samwiggin8@icloud.com
If I get enough pics I’ll post them here :) Thanks for reading, and have fun!


THANK YOU SO MUCH FOR THE TUTORIAL!!!!!!!!!!! I've been trying to figure out how to make halter squares for YEARS, but they always turn out looking terrible 😔 However, thanks to this tutorial, I can FINALLY make them!
ReplyDeleteAlso, would it be ok with you if I emailed you a picture of a model that I customized so that you can give me feedback? Thanks again!
DeleteFor sure! I’m no expert, but I’d be happy to see what you’ve done 😊
Delete